By Default Help Server get installed to server machine if you install the complete server installation of Microsoft Dynamics NAV 2013 or Microsoft Dynamics NAV 2013 R2, However in some cases during the help server installation, setup find that “Microsoft Search Service” is not available in the server and this result a error in the Microsoft Dynamics NAV Help Server installation.
What is the reason for this problem?
Microsoft Dynamics NAV Help Server use Microsoft Windows Search Service and on Windows Server 2012 R2, Windows Search Service is not installed as a default feature. Therefore if you need to use this feature you need to install this manually.
Lets see how to install Windows Search Service and fix this problem.
How to install Windows Search Service on Windows Server 2012 R2
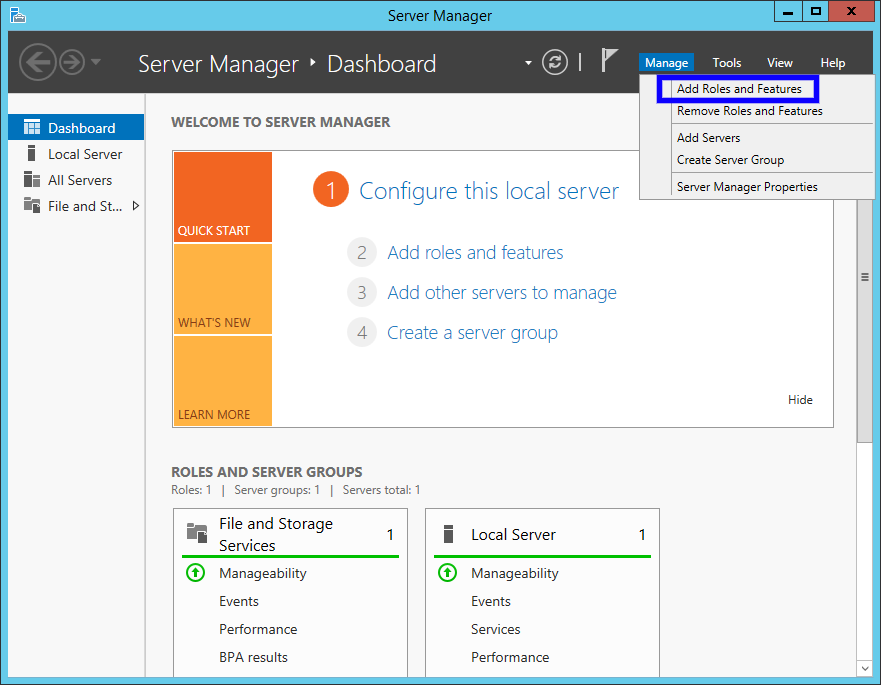
First open the Server Manager tool of Microsoft Windows Server 2012 R2 and then click on the Manage and go to “Add Roles and Features”. (Refer below image)
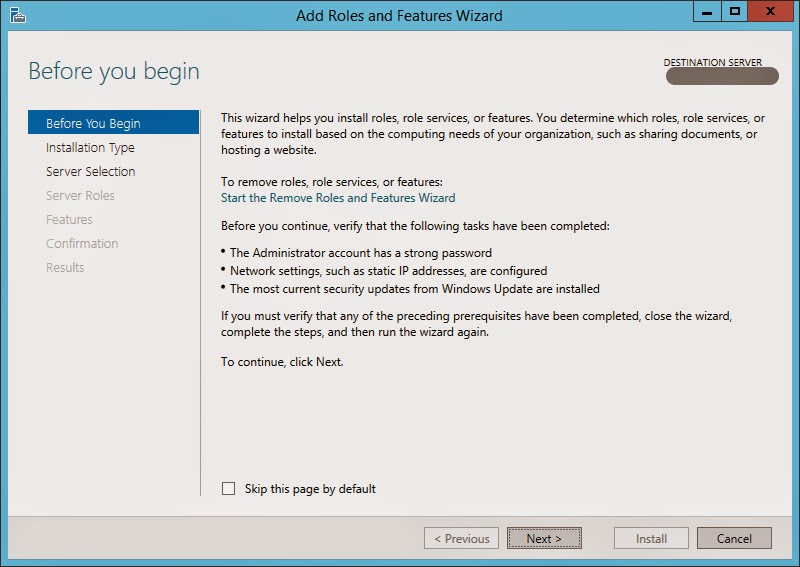
And it will open a “Add Roles and Features Wizard” window. (Refer following image)
This is the default screen unless if you didn’t tick the “Skip this page by default“. However just go through this page content or simply click “Next” button.
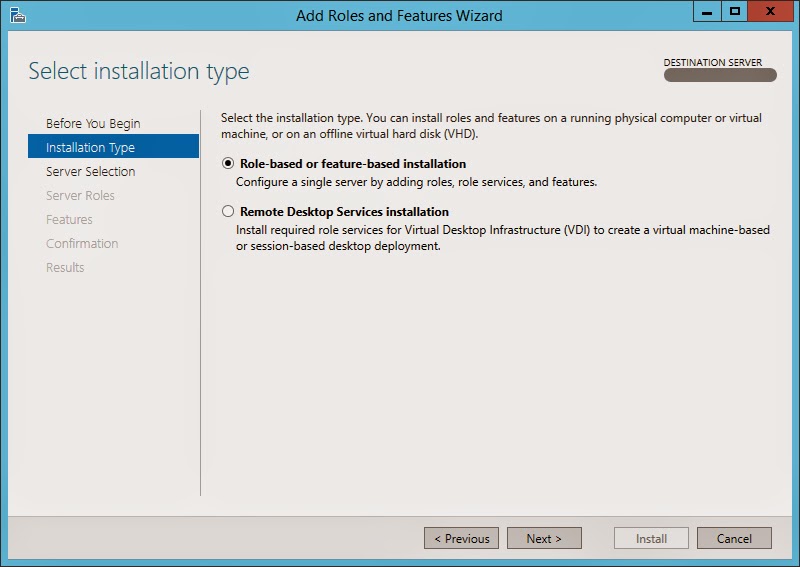
Now we are in the “Installation Type” Page. (Refer the below image)
In this window select “Role-based or feature-based installation” option. As the name implies this will allow us to add the roles, role services and features.
After selecting the option press “Next” button and it will navigate to the “Server Selection” page in the wizard. (Refer the below image)
In this page select the server that you want to install “Windows Search Service” feature. In my case I only have one server in the server pool and by default it was automatically get selected.
After selecting the server from the server pool, click the “Next” button and it will navigate to “Server Roles” page. (Refer the below image)
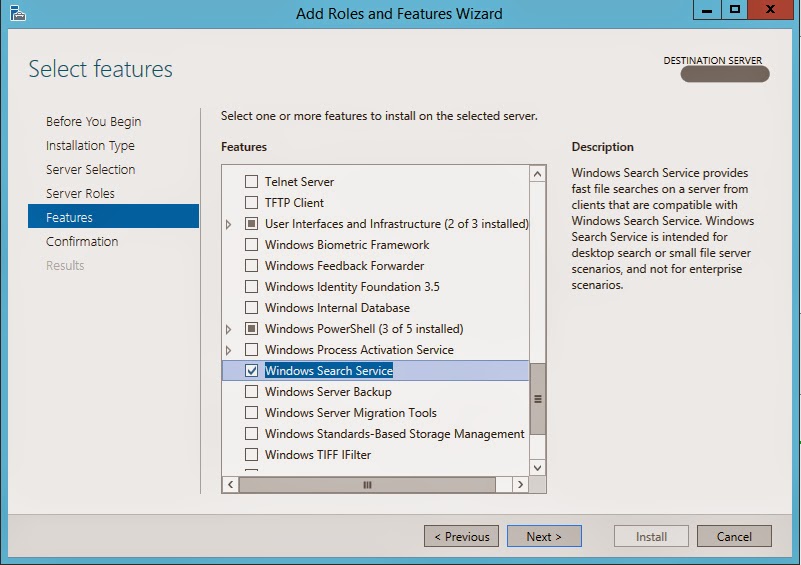
We just have to skip this window because we are not going to install a server role and we want to install a server feature. Therefore press “Next” button in the bottom of the wizard and it will navigate the page to “Features” page. (Refer the below image) Finally we are there!!
In this window you can select the features that you want to install to the selected server. In this case we only want to install Windows Search Service. To install Windows Search Service, click on the related check box as shown in the above picture.
After selecting the check box click “Next” button in the wizard to go to Confirmation page.
In this page you need to confirm your selection to proceed with the installation.To confirm the Installation click “Install” button in the page and it will take few seconds to install the Windows Search Service.
After the installation is completed following window will appear and if it does not have any error messages then you have completed the installation properly. (Refer the below image)
Thank you and Regards,
Tharanga Chandrasekara.


6 comments
Skip to comment form
once I get the service installed how do I get to the indexing part to configure
Once installed how do I get to the indexing service to configure it?
Can you provide more details?
Do I need to create catalogs and directory searches?
I a use to using Indexing Services to configure catalogs and then code to search those catalogs. How does this work in the new version? How do I get to the service to configure my catalogs?
Your post is providing some really good information. I liked its essence and enjoyed reading it. Keep sharing such important posts about this blog and its much more helpful for us . ติดตั้ง server